
Disclaimer: Nothing in this guide constitutes financial advice. Before engaging in any investment opportunities you should always discuss first with a professional financial advisor.
Unless you’ve been living under a rock these past few weeks you would have heard of Uninswap.
But what is Uniswap exactly? And if you’re not able to easily answer that question, you would also be forgiven for not knowing how to use it.
Uniswap is the decentralised swap protocol that has recently taken the crypto market by storm. Fuelled by the new wave of interest in ‘DeFi’ crypto projects, just recently Uniswap outdid Coinbase in exchange volume.
Using Uniswap instead of Coinbase or any of the other centralised exchanges has significant advantages. Before we get to those, let me give you a brief Uniswap breakdown, so you get the picture.
Following that, I’ll tell you exactly how to use Uniswap step by step.
Decentralised exchanges are nothing new.
There was Ether Delta, then IDEX, Kyber, and a few others. Since 2017, none of these ‘DEXes’ (short for Decentralised Exchange) really took off — until Uniswap appeared.
Uniswap isn’t a cryptocurrency exchange in the ordinary sense. It’s basically a framework enabling individuals to swap tokens directly from personal crypto wallets. No intermediaries, no custody, no KYC and no trust required.
The way Uniswap makes the magic happen is by providing smart contracts allowing you to do three things:
- Swap tokens
- Earn fees by adding liquidity
- Remove liquidity from pools
I’ll go over these three functions in greater depth, but in a nutshell, Uniswap is a peer to peer marketplace for token trading.
Uniswap has a few attractive advantages over traditional crypto exchanges.
- Anonymous — You don’t have to KYC (Know Your Customer verification) to use Uniswap. Instead, trading is done directly from your wallet, so your public wallet address is the only identifier involved.
- Security — Since Uniswap is non-custodial, meaning the protocol doesn’t hold funds, it’s as secure as the Ethereum blockchain itself. Uniswap’s smart contracts have been audited by several teams, including those who verified the MakerDAO contracts.
- New Tokens — Anyone can create an ERC20 token and pair it with ETH to generate liquidity for the new pool. This means Uniswap gives you instant trading access to new tokens faster than anywhere else.
- Low Fees — All it costs to use Uniswap is a small 0.3% fee per trade. Centralised exchanges tend to charge 0.5% or more per spot trade.
- Trustless — Unlike at centralised exchanges, you hold your private keys when you trade using Uniswap. You’re the custodian of your tokens and trade them directly with the liquidity pools.
Even though Uniswap sends tokens to your wallet via directly, there are, unfortunately, a few downsides.
- Gas Fees — Since Uniswap runs on Ethereum, interactions with Uniswap smart contracts all require gas fees paid in ETH. As was seen in August 2020, too many Uniswappers equaled Ethereum network congestion which in turn translated into high gas fees. Ethereum 2.0 should alleviate this issue, though (Another time, another guide).
- Failed Txs — If you don’t set your gas limit fees correctly, your transaction might fail. When it fails, you still pay for the attempt, meaning you lose gas fees but don’t get the trade you wanted.
- Scam Tokens — The advantage of anyone being able to create liquidity for tokens has a downside. Scammers create fake tokens to sucker people into providing liquidity for them. There are easy ways to spot these, which I’ll explain later.
When you trade tokens using Uniswap, you’re just swapping them. Users add token liquidity to pools before you come along and deposit your tokens. In return for your deposit of token A to the pool, you receive token B in your wallet.
Anybody can use Uniswap, and even more interestingly, since Uniswap is a protocol, anyone can create an application on top of it. Despite that, Uniswap’s original app is still the most popular.
Right, let’s get swapping.
Get a MetaMask Wallet
Before we get into Uniswap, the first thing you should do is create a MetaMask crypto wallet. MetaMask lets you connect to blockchain applications like Uniswap from your browser.
You can connect to Uniswap with other wallets but MetaMask is the most stable and trusted wallet to go with. It’s best not to complicate things — most Uniswappers use MetaMask.
MetaMask installs as a browser extension. After installing, create your account, write down your seed phrase (don’t ever lose or share this), and you’re good to go.
Buy Some ETH
Uniswap only deals in Ethereum-based digital assets, otherwise known as ERC20 tokens. To swap these, you have to pay a gas fee to the Ethereum blockchain — gas fees are paid in ETH.
Even if you already have ERC20 tokens and want to trade these for ETH or other ERC20s, you’ll still need Ethereum to cover the gas so be warned. If you don’t have ETH in your MetaMask wallet, your trades won’t go anywhere. There is no way around this.
How much Ethereum should you buy? Well, it depends on how much swapping you plan to do and how congested the network is.
The best way to calculate all of this is to visit: ETH Gas Station
You should always plan on a roundtrip, which means gas for the swap, plus gas to move your new tokens back to Uniswap if you’re trading.
Head over to Uniswap
Go to Uniswap.org. Once there, you’ll see two options:
- Launch App
- Read the Docs
Head over to Uniswap
Go to Uniswap.org. Once there, you’ll see two options:
- Launch App
- Read the Docs
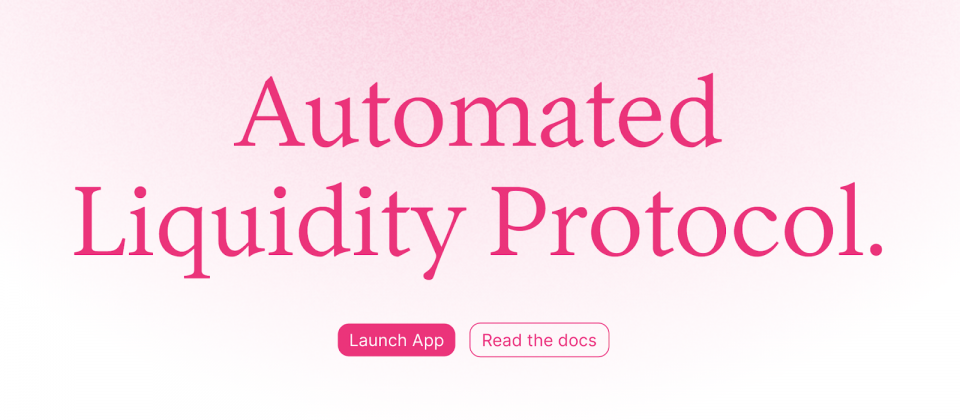
Since this is your first time, it wouldn’t hurt to read the docs first. There’s a lot of big language stuff about automated liquidity protocols etc. If you care, these docs are a great read.
If you just want to swap some coins, keep moving.
Launch Uniswap App
Click Launch App. This is the screen you find:
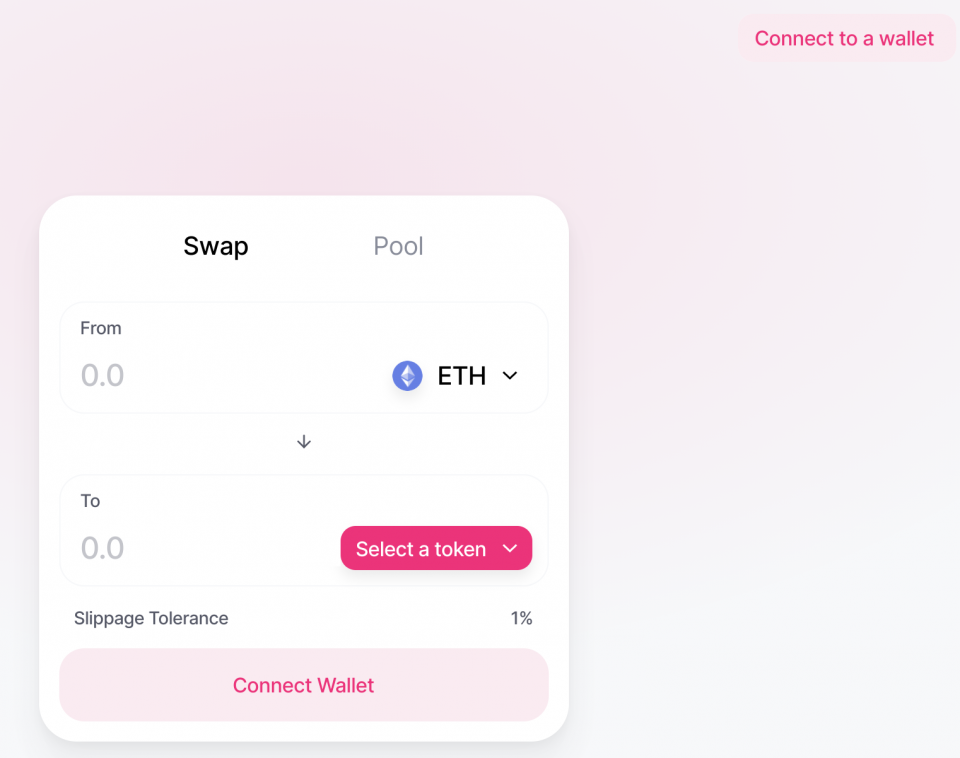
Assuming you’re logged out of MetaMask, you’ll see the option to connect to a wallet in the upper right-hand corner. Go ahead, click it. Now you get the connect to a wallet screen.
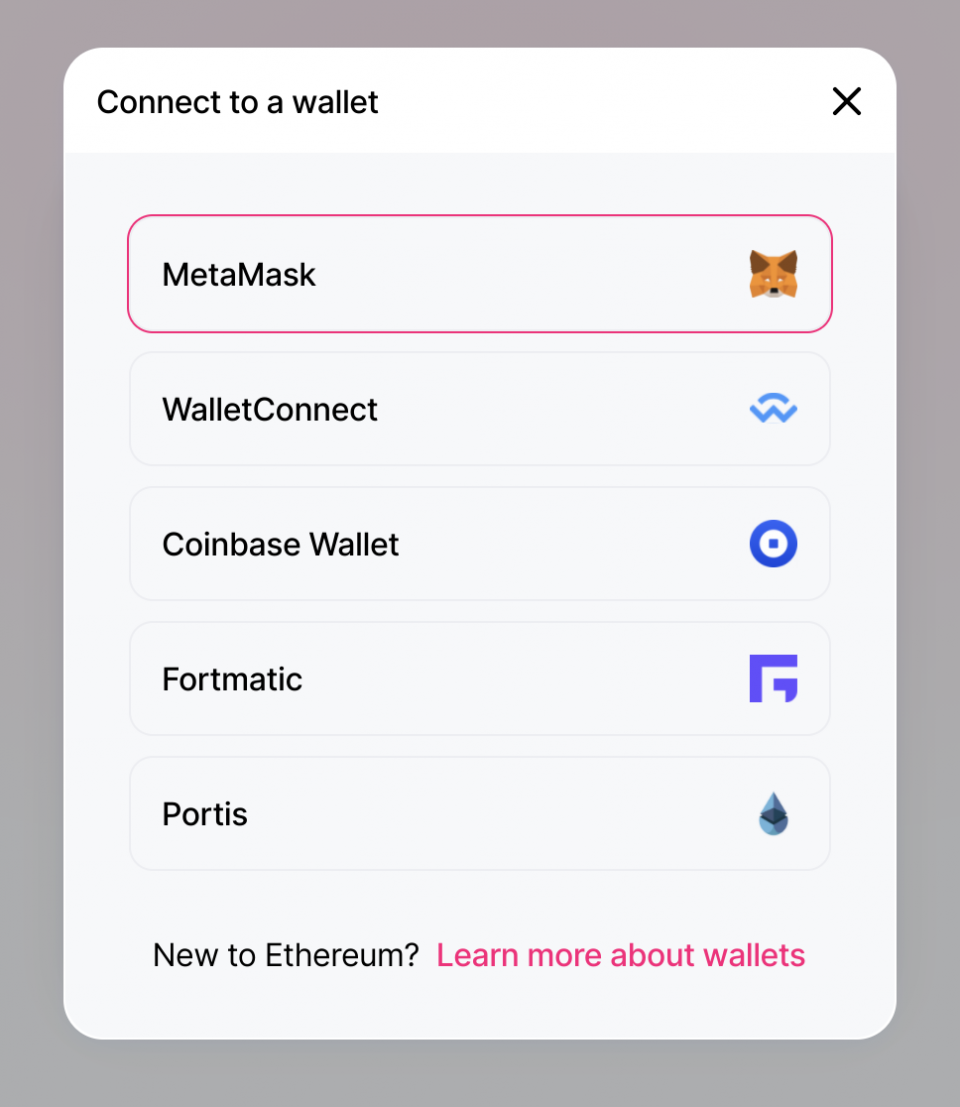
Click MetaMask, which will pop up your MetaMask extension and prompt you to log in. Once done, you’re taken back to the swap screen. Now It’s time to swap.
Select a Token
If this is your first time using Uniswap, you’re probably trading ETH for an ERC20 token. By default, Uniswap has ETH in the from field and allows you to select the token of your choice in the to field.
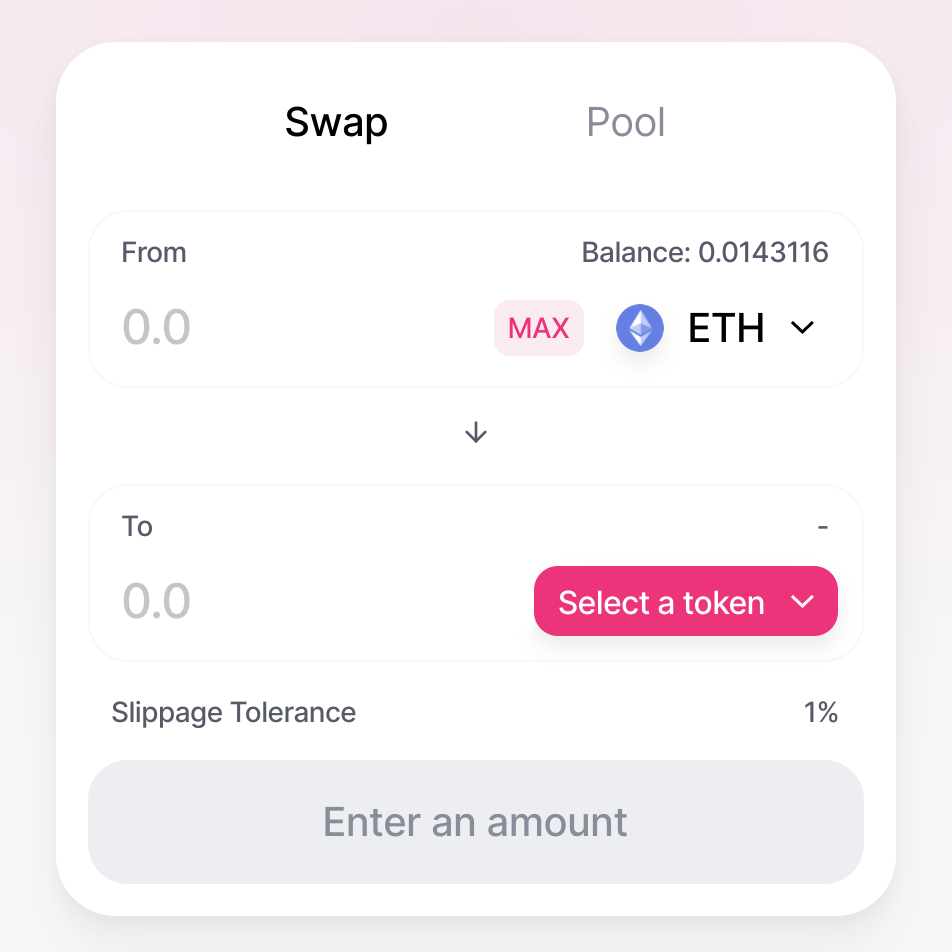
This means you’re sending ETH from your wallet to the liquidity pool for the token selected.
Clicking select a token brings up a token lists screen. These are prepackaged lists of tokens according to categories, making it easy for you to browse tokens.
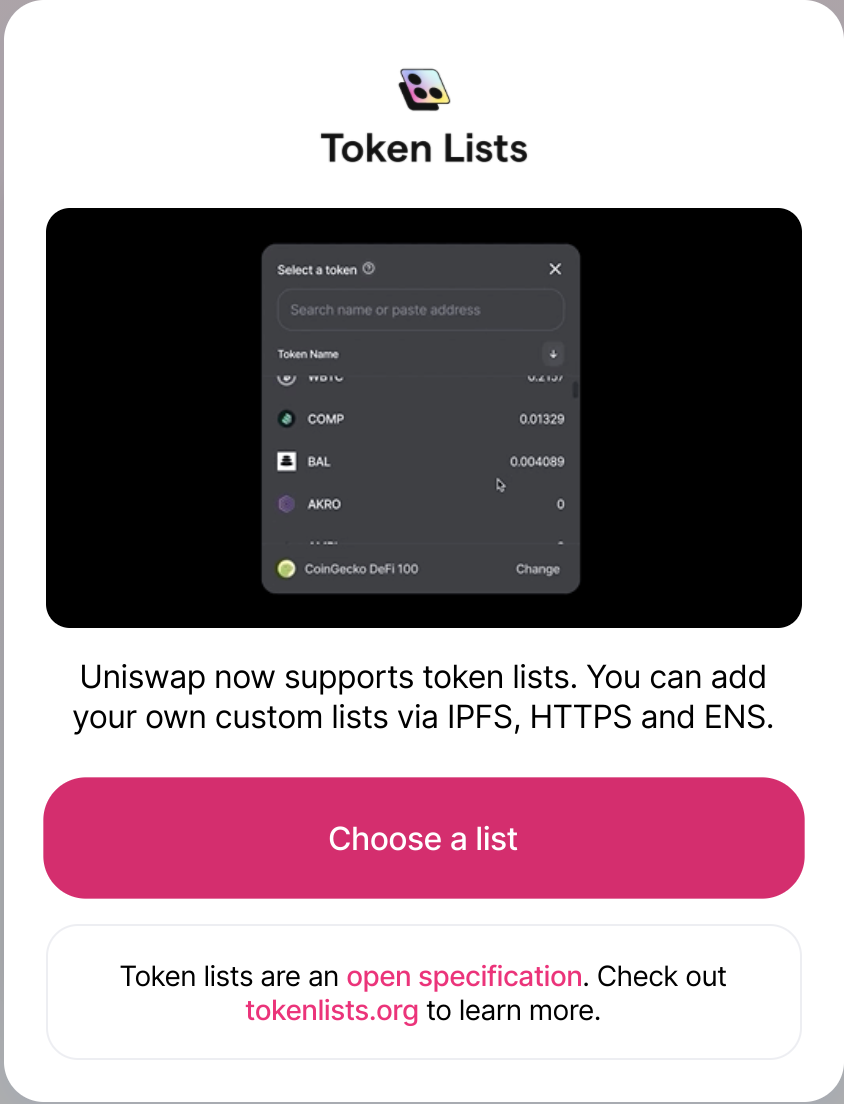
Choose a list, then browse and select the token you want.
Pro tip: If you know which token you want to buy, use CoinGecko to get the token contract address, then paste it at the end of —> https://uniswap.info/token/. This method takes you directly to the token and lets you trade or add liquidity.
Enter Amounts
Now, enter the amount of ETH you’re swapping in the from line.
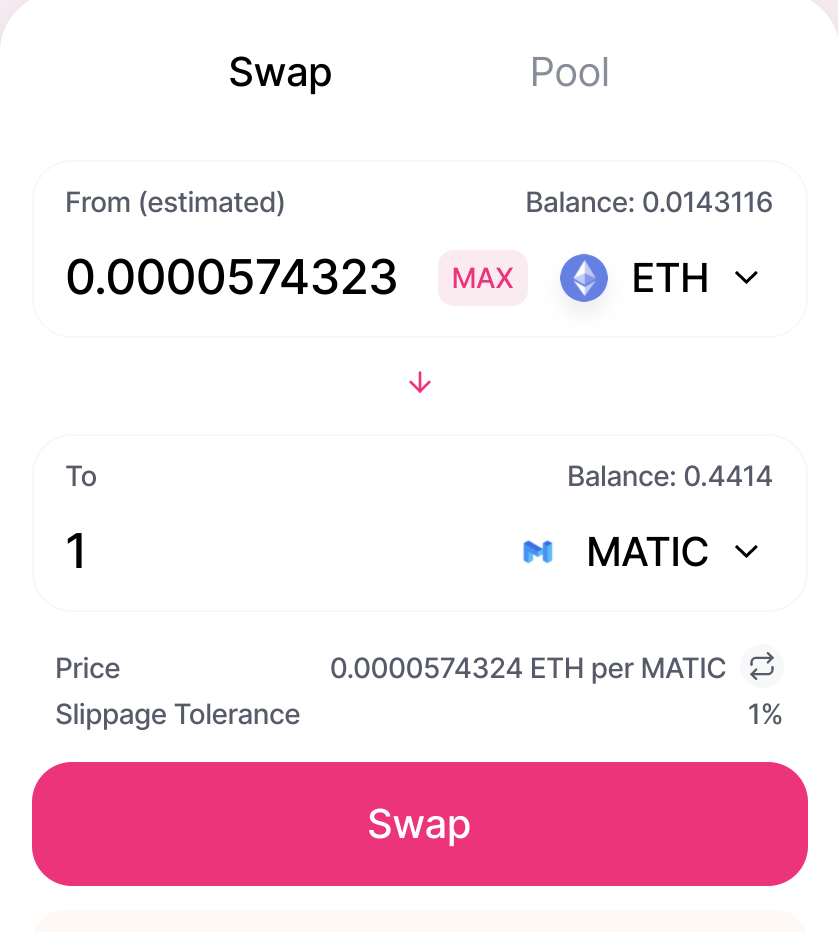
The to line will populate with the equivalent amount for the token you’re buying.
Something to be aware of here is the line below the to field about slippage tolerance. Basically, slippage refers to your buy size relative to the amount of liquidity in that pool. If you have a large order relative to the pool size, slippage will increase (and your exchange rate declines).
In practice, slippage happens when you enter your order, click swap, but get an error because the price changed between when you entered the order and clicked swap.
Less slippage = higher chance of the token’s price shifting = greater odds your transaction won’t happen. This is especially true for hot new tokens with tons of trading action happening. To mitigate this issue, you can increase slippage tolerance.
Remember though, the tradeoff is more slippage tolerance means fewer tokens.
Hit Swap
Once everything is set up correctly, and you’re ready to go, hit swap.
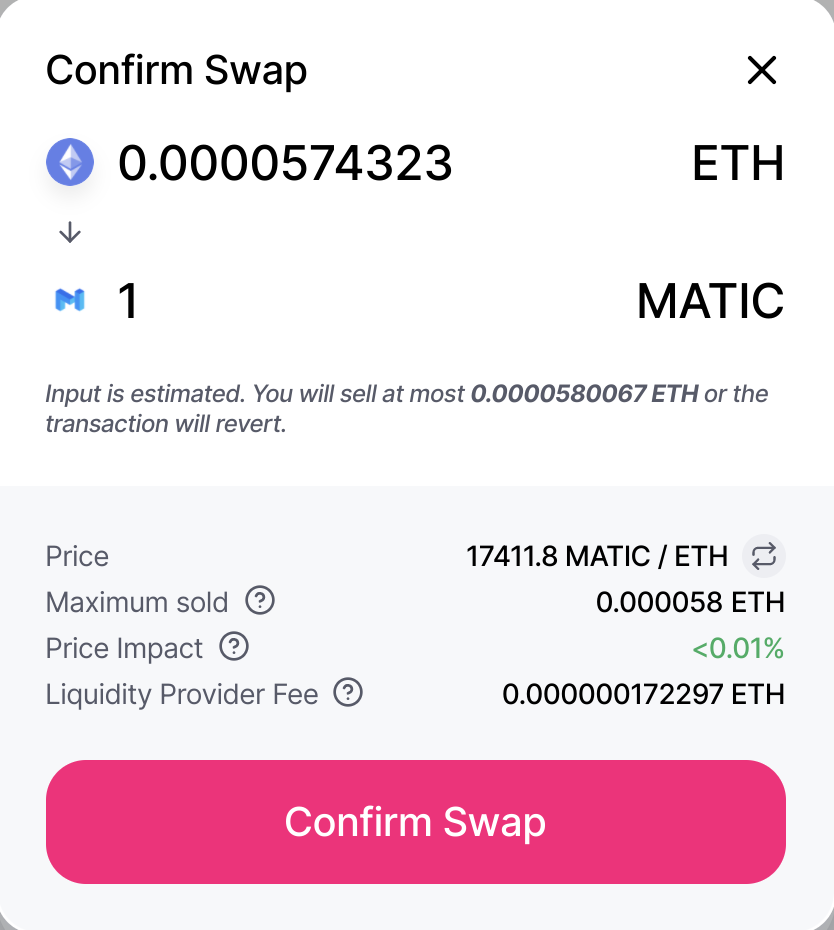
The next screen confirms the details of the transaction. If all looks good and as it should, Confirm swap.
After you confirm the swap, MetaMask will pop up, asking you to confirm or reject the transaction.
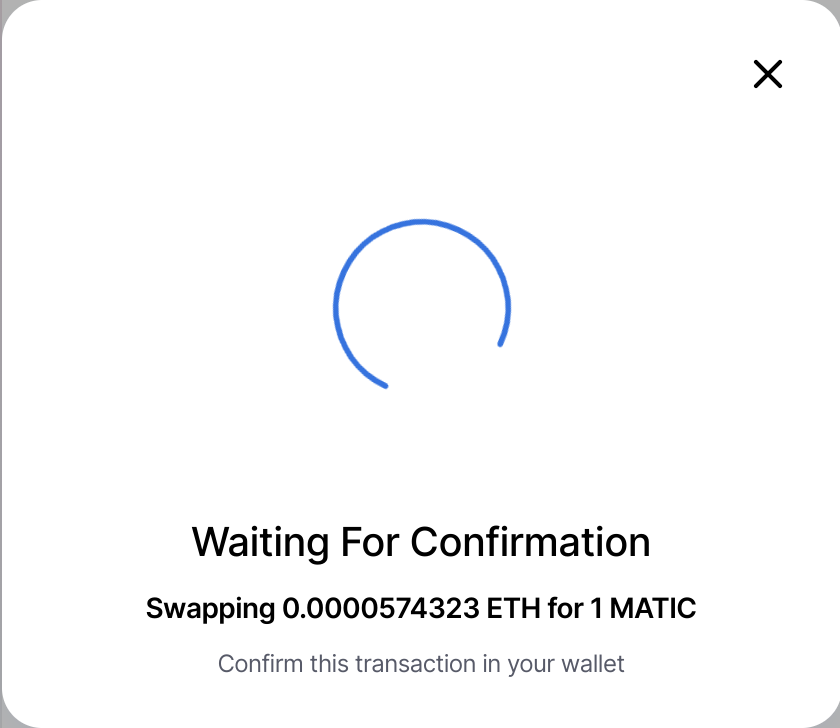
Now, confirm the transaction
Receive Tokens
Once you confirm the transaction in your MetaMask wallet, you have to wait a few moments for the tx to hit the blockchain. You can watch this process in action by clicking the Etherscan link given by Uniswap.
The more congested Ethereum is, the longer these confirmations will take. After a short wait, you’ll see your tokens in your MetaMask wallet by clicking assets.
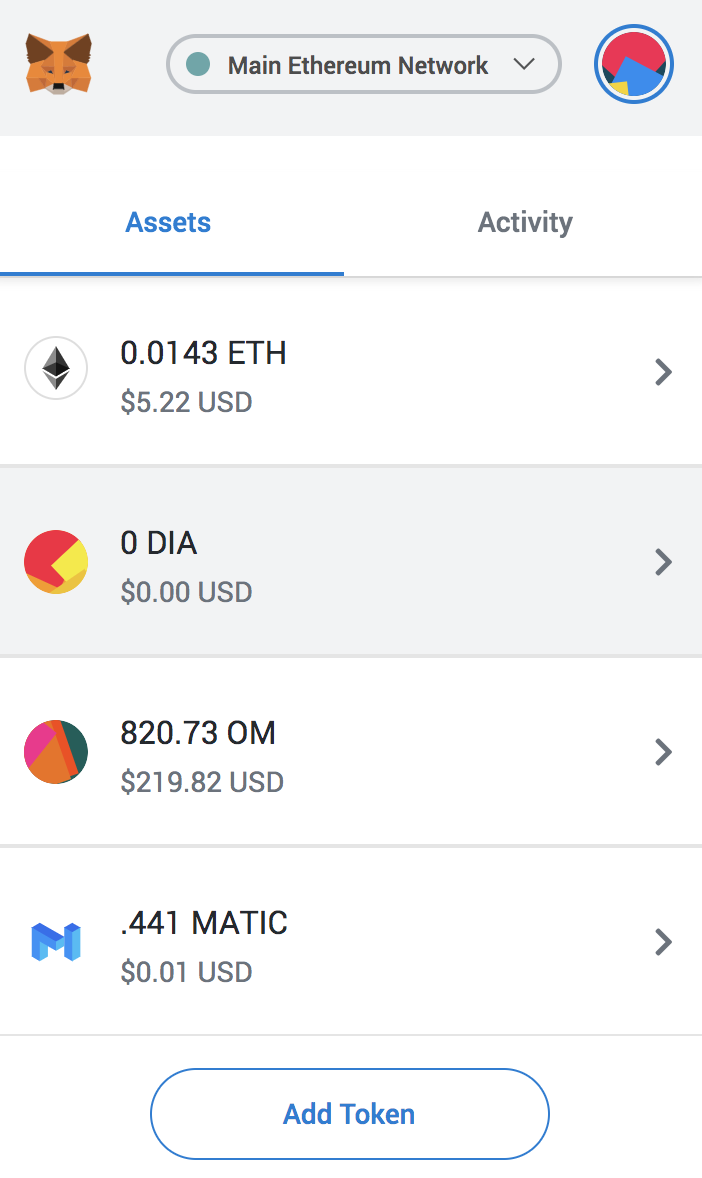
You can now keep these tokens in your MetaMask wallet, sell them when (if) they moon, or simply throw them in a cold storage wallet and forget about them.
Uniswap is a very straightforward exchange protocol, but, to the uninitiated, there are few tips and tricks to make your experience drama-free.
How To Avoid Scam Tokens
Avoiding scam tokens is your top priority. Uniswap lets anyone create liquidity for any ERC20 token — even tokens that are fake.
For example, a hyped token is hitting the market any day now. People can’t wait. Suddenly, said token shows up on Uniswap. However the actual team behind the project hasn’t confirmed anything being available.
People start throwing ETH at it. There’s $100K sent to the pool before you know it when suddenly the real team updates their Telegram saying they haven’t released the token.
Avoiding scams like this is simple — always verify token contracts using CoinGecko and Etherscan.
On Etherscan, there’s a convenient field called holders. This is the number of wallets holding the token. This field should have many holders — if you see a token with a suspiciously low number of holders, it’s likely fake.
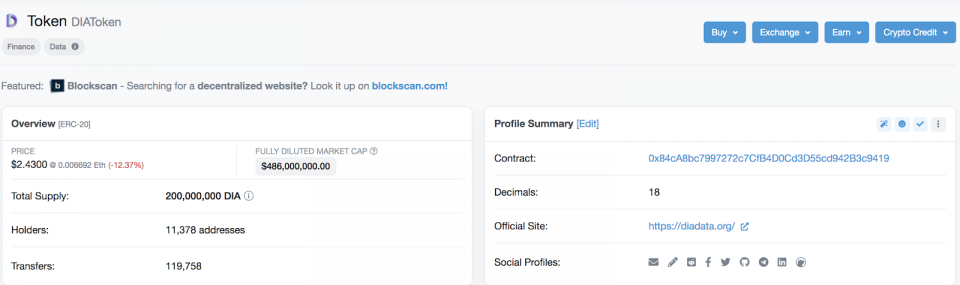
Always triple check the contract address so that it lines up on Uniswap, CoinGecko, and Etherscan before swapping.
Avoiding Failed Transactions
This is irritatingly common.
You don’t get the tokens you wanted, and ETH gets deducted from your wallet to cover gas.
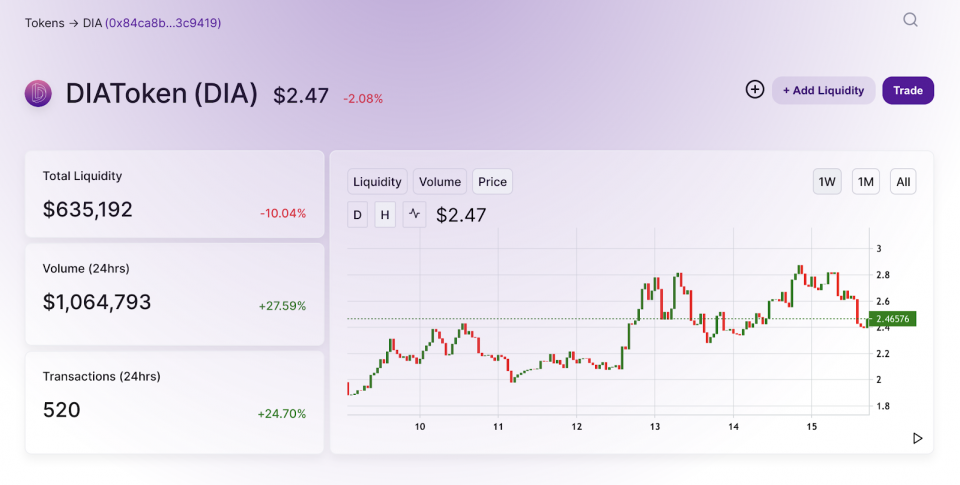
The best thing to do is to avoid failed Uniswap transactions in the first place. To do this, make friends with the Uniswap analytics page.
Search for the pair you want to trade — let’s use DIA-ETH for this example.
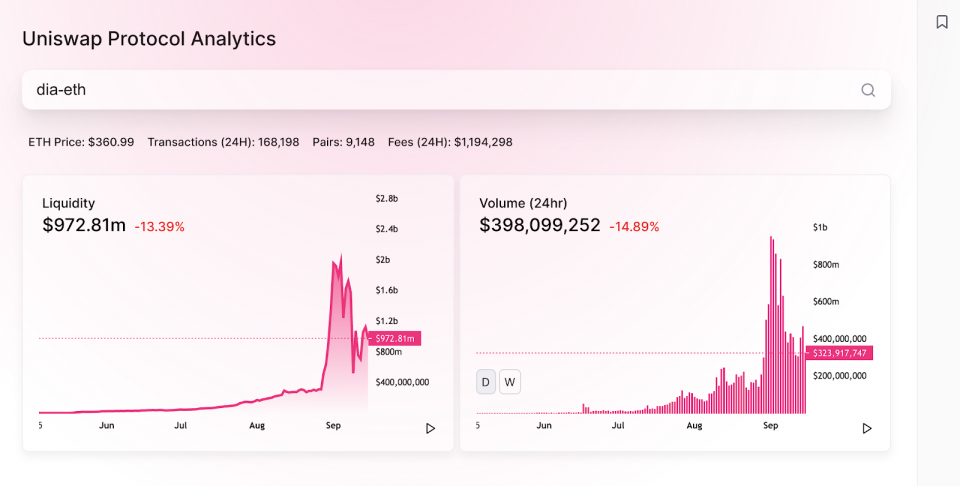
Now, scroll down to transactions, then click swaps. On the left column, you’ll see swap ETH for DIA and swap DIA for ETH. Click the one that applies to your swap.
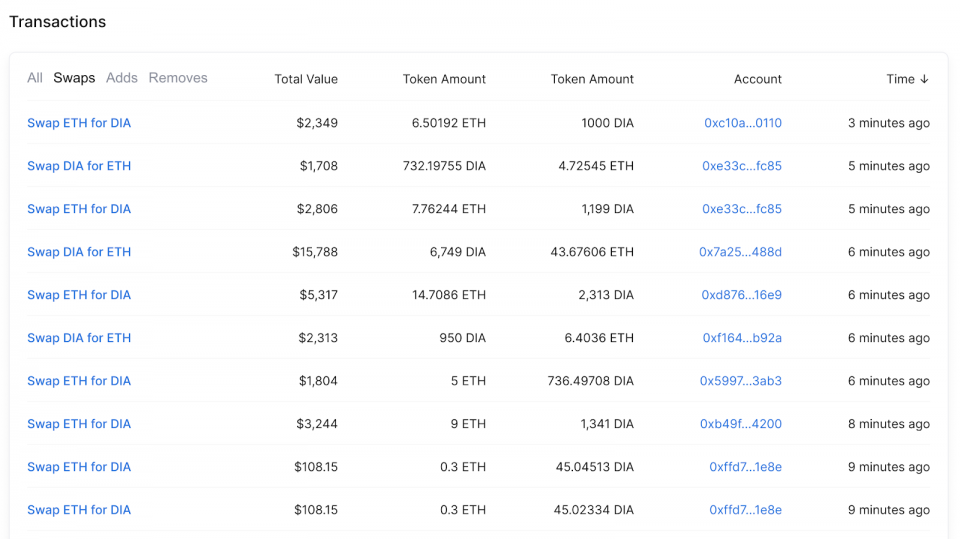
This will take you to the blockchain record for that swap, allowing you to see the transaction details. Scroll down to the transaction fee field, then click to see more just below it.
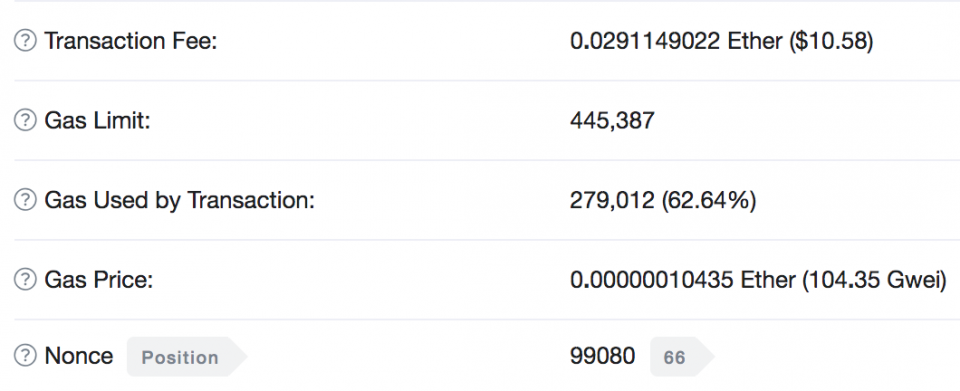
See all that data? You view a few transactions like this to see what gas price (GWEI) was used in recent successful transactions. Use this info to set your swap for success ahead of time.
Uniswap is far from perfect, but you’ve got to give it a bit of leeway.
This is the cusp of decentralised exchange technology, and it’s so well adopted that even Binance is feeling the heat. That’s why they’re listing digital assets more quickly these days, lest Uniswap take all the exchange volume away.
Getting Uniswap right the first time will, of course, make your experience a happy one. If something goes wrong, fear not. Instead, consult this guide again as it will help you to use Uniswap for the first time successfully
Uniswap — https://uniswap.org/
Metamask — https://metamask.io/
ETH Gas Station — https://ethgasstation.info/
Coingecko — https://www.coingecko.com/en
Etherscan — https://etherscan.io/
Daniel Lesnick is a Mentor in Residence for Wayra UK and co founder of Crypto/Blockchain/Web3 media agency ‘The Content Tap. You can follow him on Twitter: @TheDannyLes.