
Getting Started with Blockchain on AWS, Part 1: Creating and Configuring a Ledger
Blockchain has rapidly gained popularity because of its ability to store transactions in an immutable format, and Amazon makes it really easy to create your own Blockchain ledger within the AWS console. Brien Posey shows you how it’s done.
Over the past few years, Blockchain has rapidly gained popularity because of its ability to store transactions in an immutable format. Amazon makes it really easy to create your own Blockchain ledger within the AWS console. In this two-part blog series, I will show you how it’s done.
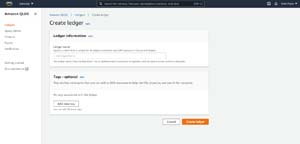
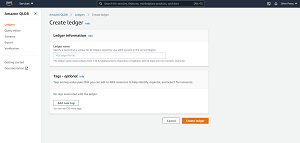
To get started, select the Amazon QLDB option from the list of services (you can find it in the Database section). When the QLDB page opens, click on the Create Ledger button. This will take you to the Create Ledger page, which you can see in Figure 1. As you can see in the figure, the process of creating a ledger is really simple. All you have to do is to enter a name for the ledger that you are creating (plus any optional tags that you want to use) and then click the Create Ledger button.

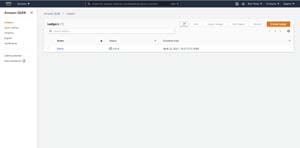
It can take several minutes for AWS to create the new ledger. You can move on to the next step in the process once the ledger’s status is Active. If after several minutes the ledger still does not appear to be active, try clicking the Refresh button.
At this point, the newly created ledger is up and running, but it doesn’t actually do anything yet. That being the case, you will need to decide if you want to jump straight into configuring the ledger for production use, or if you would like to populate the ledger with sample data so that you can get a feel for how it works. For the purposes of this blog series, I will show you how to automatically create sample data that you can use for testing purposes. If you prefer to create your own data (production or otherwise), I will show you where to go to get started with that in a moment. So with that said, go ahead and click on the ledger that you just created and then click on the Getting Started tab on the left side of the screen. This will take you to the Getting Started page shown in Figure 3.
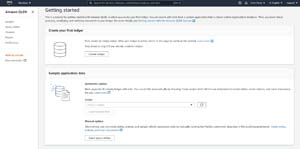
As you can see in the figure above, the Getting Started screen includes a section labeled Sample Application Data that you can use to populate your ledger with sample data. If you are wanting to create real data, then just go to this section and click the Open Query Editor button. You can use the Query Editor to create data manually. To automatically create sample data however, select your ledger from the drop down list and then click the Load Sample Data button.
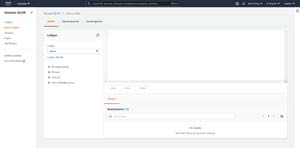
Once you have loaded the sample data, click on the Query Editor button. When prompted, choose your ledger from the drop-down list. When you do, you will see a list of the tables contained within the database. In Figure 4 for example, you can see that the Demo ledger now contains tables named DriversLicense, Person, Vehicle and VehicleRegistration.
Each table within the ledger also includes one or more indexes. You can see what indexes exist for a particular table by simply clicking on the table to expand it. The DriversLicense table, shown in Figure 5, includes indexes named LicenseNumber and PersonalID.

Each table contains one or more indexes.
For more complex ledgers, you may find it easier to look at the entire structure at once rather than clicking on tables individually. You can do so by clicking on the Ledger Details link that is shown in the figure above. Not only does this cause the entire database structure to be displayed, you can also verify that each of the indexes is online, as shown in Figure 6. Incidentally, you can delete a table or index by selecting it and clicking the Drop Table or Drop Index button.
As you can see, AWS makes it really easy to create a blockchain ledger and to populate it with data. In the next blog post in this series, I will show you how to interact with the ledger that you have created.
About the Author
Brien Posey is a 19-time Microsoft MVP with decades of IT experience. As a freelance writer, Posey has written thousands of articles and contributed to several dozen books on a wide variety of IT topics. Prior to going freelance, Posey was a CIO for a national chain of hospitals and health care facilities. He has also served as a network administrator for some of the country’s largest insurance companies and for the Department of Defense at Fort Knox. In addition to his continued work in IT, Posey has spent the last several years actively training as a commercial scientist-astronaut candidate in preparation to fly on a mission to study polar mesospheric clouds from space. You can follow his spaceflight training on his Web site.